
Pinned List Views

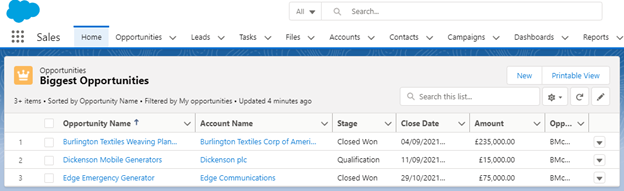
Once you select which list view you want to pin, hit the pin icon next to the related list. Once selected, the next time the user returns to the object tab, the related list they selected will be pinned, just like the below.

Default List View as a Tab
- This component takes advantage of Salesforce Lightning’s successfully flexible course bar, which can be changed in different ways.

2. Then, select the drop-down bolt close to the item to show more choices. Click on the base menu thing that permits you to open the rundown view in another tab.

3. Assuming you check out the finish of your navigation bar, you should see the tab you have quite recently opened. Click on the bolt again and add this rundown view to your navigation bar.
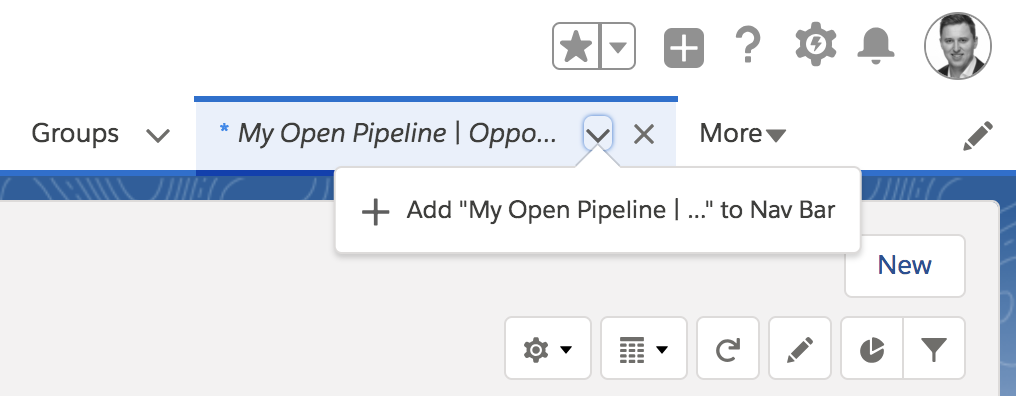
Once this has been completed, you have successfully added a list view to your navigation bar. But to further ensure this is optimized and is correctly placed, you can select the pencil icon on the right-hand side of your navigation bar.
3. Default List View on the Home Page
After reading this post, you may be wondering “How do I see the I Pin list for all users in Salesforce?” Well, unfortunately, Salesforce has disabled this feature on purpose. To read more on this topic, click on the original Salesforce article to clear all your doubts
As you would definitely know, making a custom home page utilizing the Lightning Experience App Builder permits you to characterize what parts are shown. On the off chance that you select the “List View” component, then you can select the list view that is shown by default.
Please click this link to read more about this topic.