
Salesforce Workbench is a Free, Online device that can be utilized for Data Management activities such as Bulk Record Updates, Mass Creation, and Mass Deletion. If you’ve ever used Data Loader or the Salesforce Data Import Wizard, it is similar to those tools.
What is Salesforce Workbench?

Workbench is a powerful application that helps developers interact with their Salesforce Data. It allows users to quickly and easily insert, Update, and Export Data, and much more! Up to 5 million records can be used, so this is the perfect solution if you have a lot of data.
Common ways to use Workbench include:
- Bulk Record Updates, Mass Creation, and Mass Deletion.
- Perform SOQL and SOSL.
- Deploy and Debug Applications.
Advantages of Using Salesforce Workbench
Salesforce Workbench conveys many advantages to individuals who know how to use its elements to their fullest. The fact that there are contrasts between Salesforce information and the executive’s appliance notwithstanding, there are stand-apart motivations behind why I especially like Workbench:
- If you’re already logged in to Salesforce, Workbench can maintain your current user session so you don’t need to log in again.
- Work with any Standard or Custom objects. This is different from the Salesforce Data Import Wizard, which doesn’t let you mass Update Opportunities.
- Force-reset a user’s Salesforce password on their behalf.
- It’s free, pretty fast, and really easy to use.

Typical ways to use Salesforce Workbench
Here are six ways you can use Salesforce Workbench:
- Force-reset a User’s Salesforce Password
- Run a SOQL Query (Salesforce Object Query Language)
- Mass Update Records
- Mass Create Records
- Mass Delete Records
- Undelete Records
1. Force-reset a User’s Salesforce Password
If you’ve ever had trouble with a user and the Forgot Password functionality (or the pesky incomplete security question), you can use Workbench to reset a User’s password to anything you choose.
If you’ve ever had trouble with “Forgot Password” functionality (or the pesky incomplete security question) when assisting a user to log in, you can use Workbench to reset a user’s password, to anything you choose, in five easy steps:
- Log in to Workbench.
- Click “Utilities”.
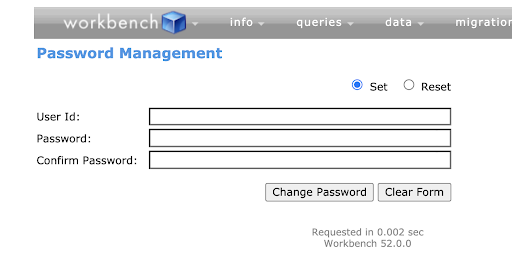
- Click “Password Management”

4. Enter the user’s ID, new Password, and confirm the new password.
5. Click “Change Password” and let the user know their new password. It’s also wise to send them instructions on how to reset their password and their security question after they log in.
2. Run a SOQL Query
Salesforce Object Query Language (SOQL) is utilized to scan your association’s information for explicit information and “get” it in an automatic way.
Note that I’m not a SOQL master, nonetheless, Workbench makes it extremely simple for me to work with SOQL. Workbench gives you a ‘Manufacturer‘ to assist with making your inquiry.
SOQL inquiries can be utilized to remove information from Salesforce (Almost like structure a Report) then again, actually you can give an account of fields and records you can’t ordinarily get to by means of a report.
For example, you can query which users have a Service Cloud license, or query on fields of all the Leads in the Recycle Bin.
- Sign in to Workbench.
- From the Queries tab, click “SOQL Queries”.
- Pick the article you need to inquiry (in this model, how about we do Leads, and we will check out the First Name, Last Name, Email, Last Modified By, and Last Modified Date of the Deleted Leads as it were).
- The Developer will populate all Lead fields in the “Fields Section”. Feature the fields you need to find in your question.
- Utilize the Filter Results to produce any channels.
- For this situation, we just need Leads that have effectively been erased, so we need a channel for “IsDeleted = TRUE” (You can click on the green plus icon to add multiple filters).

- On the top, the “View As” section allows you to control how the results will be displayed.
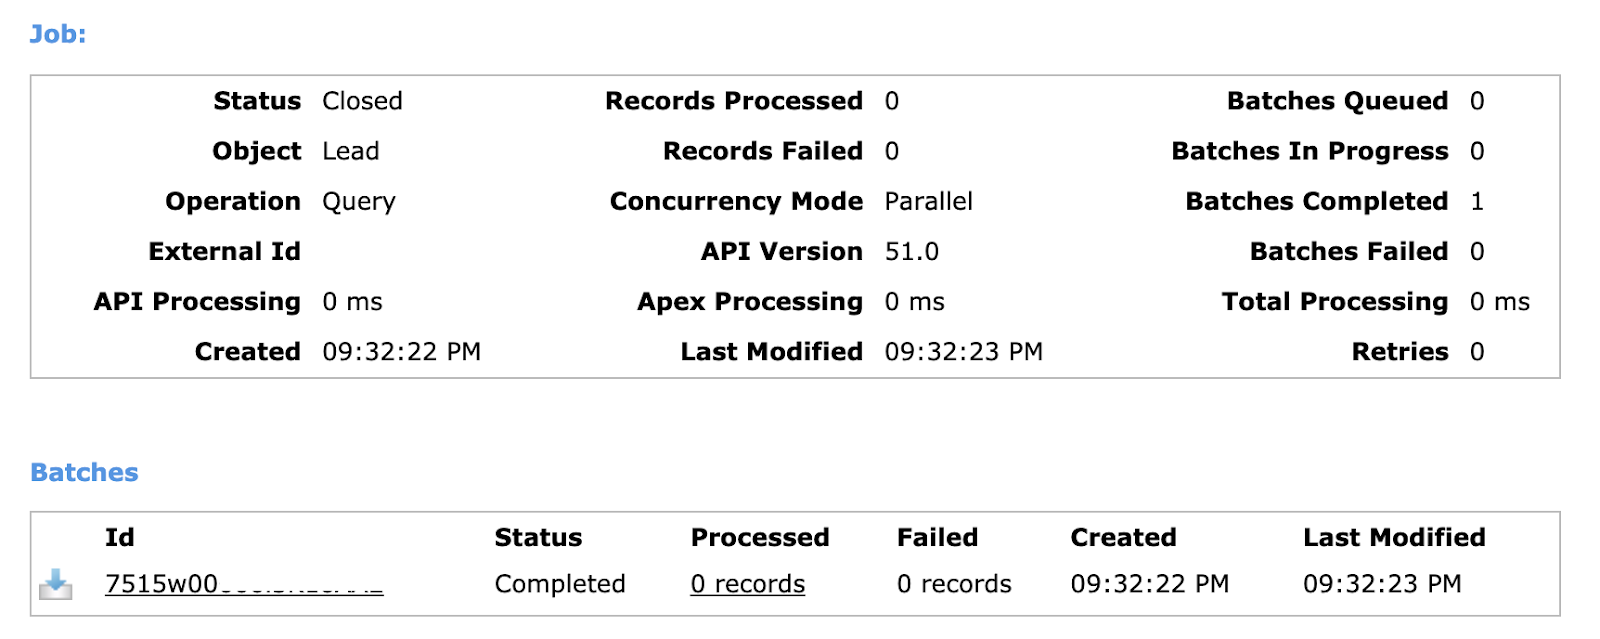
- Click “Query”.
- View or Download your results.
3. Mass Update Records
Mass Record Updates are very easy in Workbench. First, you’ll need to prepare your CSV, with a column containing the record ID, and one column per field/s you would like to update.
- Log in to Workbench.
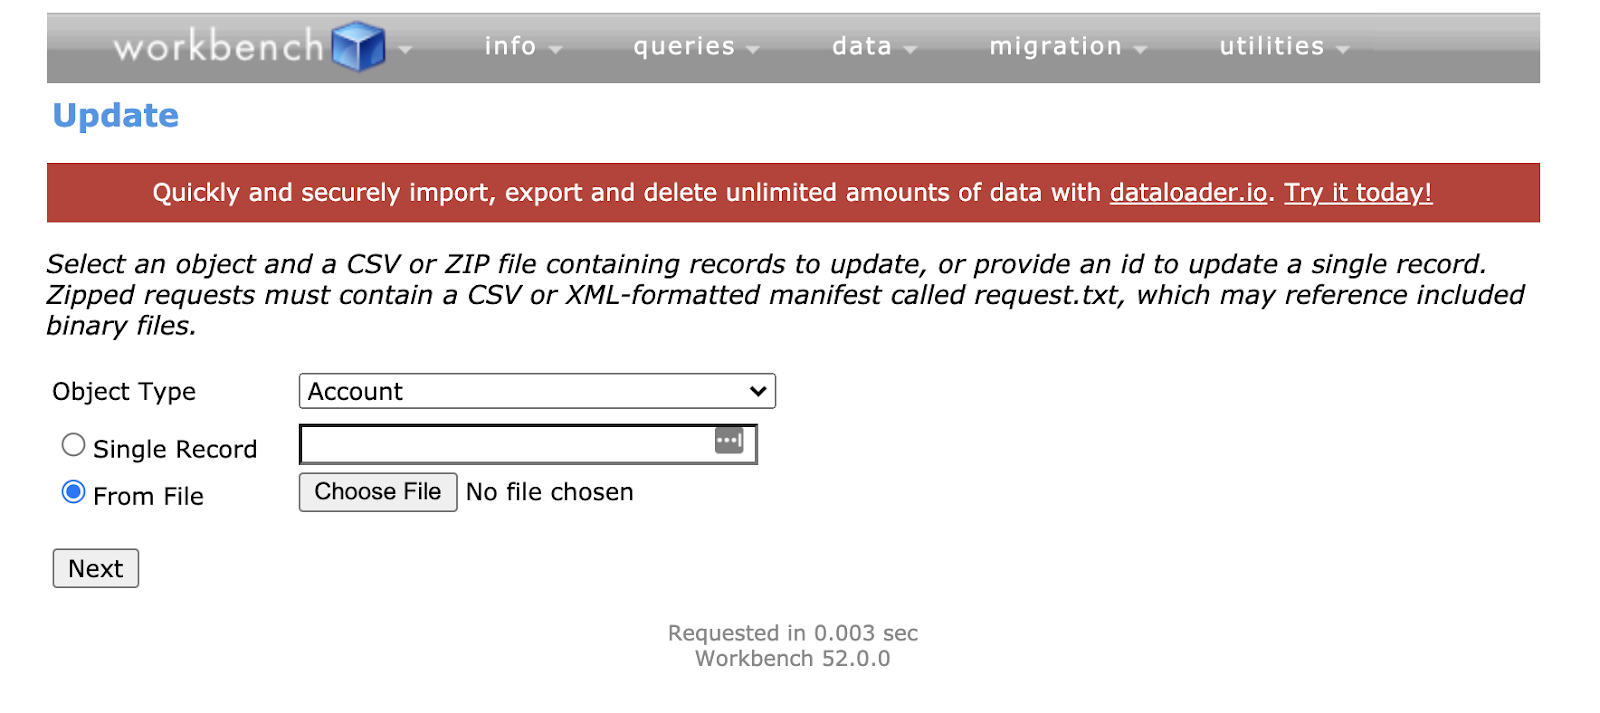
- Data → Update.
- Select the Object Type.
- Select “Single Record” or “From File”.
- Map your fields (make sure you map the ID of the Records you want to update if doing many records!)
4. Mass Create Records
The means to mass record creation are almost equivalent to mass update. Set up a CSV with every one of the new records you need to make, guaranteeing Picklist values are right, and all necessary fields are incorporated!
- Log in to Workbench.
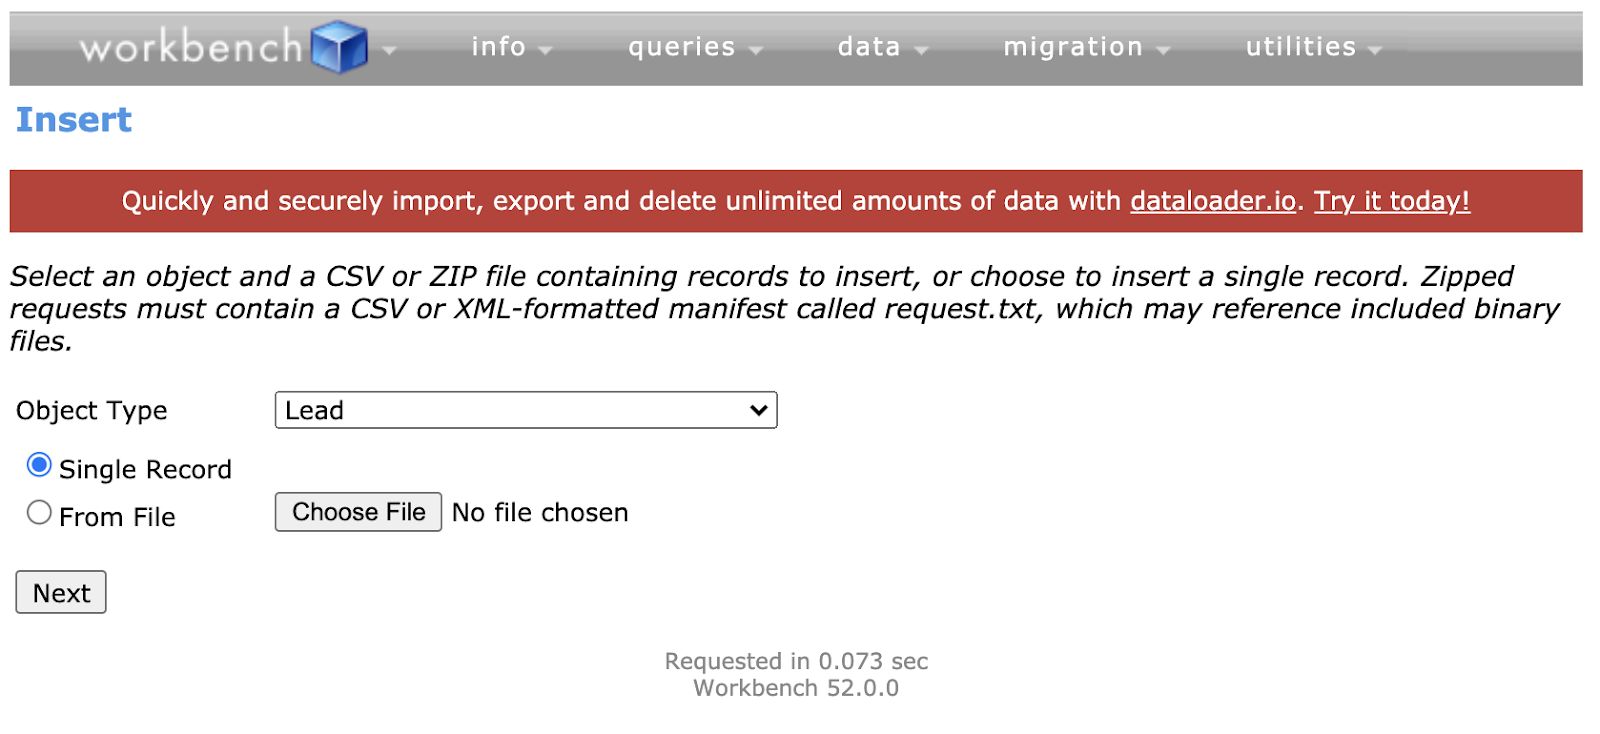
- Data → Insert.
- Select “Single Record” or “From File”.
- Map your fields (Make sure you Map the ID of the Records you want to update, if doing many records).
A Quick Note about “Single Record”. This is a great feature to Create or Update:
- A Single Record,
- Fields that are editable but not on the Page Layout,
- Fields that you do not want to add to the Page Layout,
- If you do not want to do a full CSV Import.
5. Mass Delete Records
The mass record feature include in Salesforce is fine, yet it is restricted to just 250 Records all at once. Look to Workbench assuming you really want to erase more than that!
Make a Report of the multitude of records in Salesforce that you need to erase. You will just need the ID of the Record to play out the erase, yet it’s smart to back up any Records you need with a Full Report, saved outside of Salesforce.
- Log in to Workbench.
- Data → Delete.
- Select “Single Record” or “From File”.
- Map the ID field.
- Proceed with the deletion.
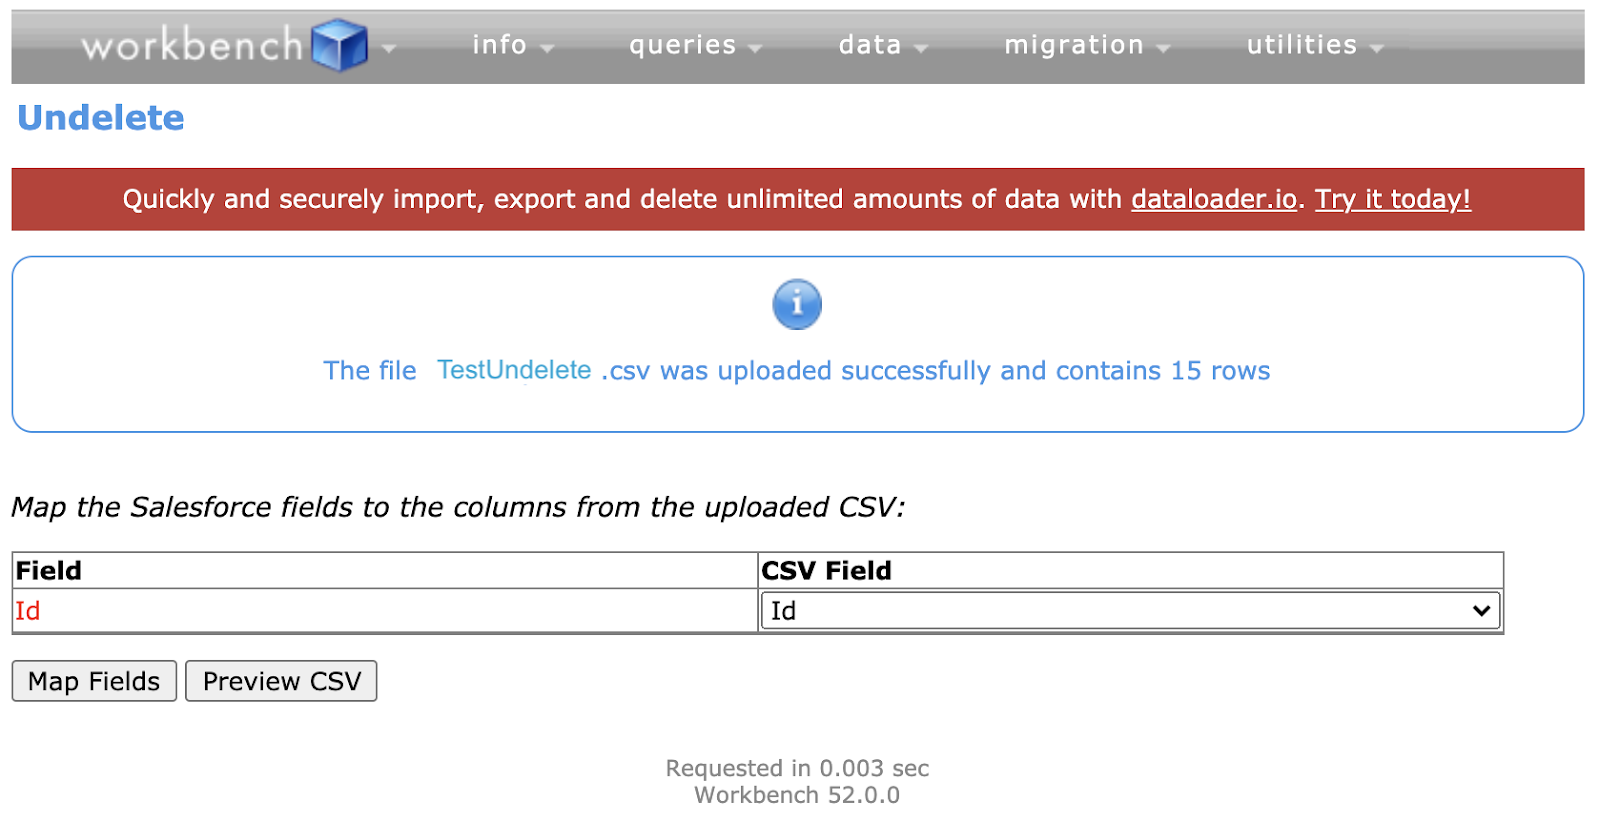
6. Undelete Records
Undeleting Salesforce Record Data is similar to the steps in the previous point, and it’s really beneficial to know the process in reverse.
Use the SOQL Query above to report on records you have that are already deleted. We’re only going to need the ID column on a CSV of the records you want to undelete. Workbench still respects the 15 day Recycle Bin rule, so you won’t be able to undelete anything past this time that has already been permanently deleted.
- Log in to Workbench.
- Data → Undelete.
- Select “Single Record” or “From File”.
- Map the ID field.
- Proceed with the Undelete.
- Retrieve Source Code: For custom Applications, Articles, and parts (ie. Lightning Web Components)
- SOSL search: As well as SOQL questions, you can likewise perform a look with SOSL inquiries (Salesforce Object Search Language).
- Async SOQL question: these inquiries run behind the scenes, looking through huge informational indexes (counting BigObjects and outside objects).